First Time Chopstick Making in Tokyo: What to Expect, Step by Step

You don't need any experience for your first time chopstick making in Tokyo, and you definitely don't need steady hands to start with. The kanna sits in a jig that does most of the guiding, and my own first pass years ago left me convinced I would gouge straight through the blank; the cut came out even on the first try. Ten minutes in, the nerves about looking clumsy in front of a room of strangers were gone, replaced by the same quiet concentration everyone else at the bench seemed to have. What follows is the exact hour, minute by minute, what first-timers actually worry about, how families with kids fit in, and which workshop suits a nervous beginner best.
Quick answer
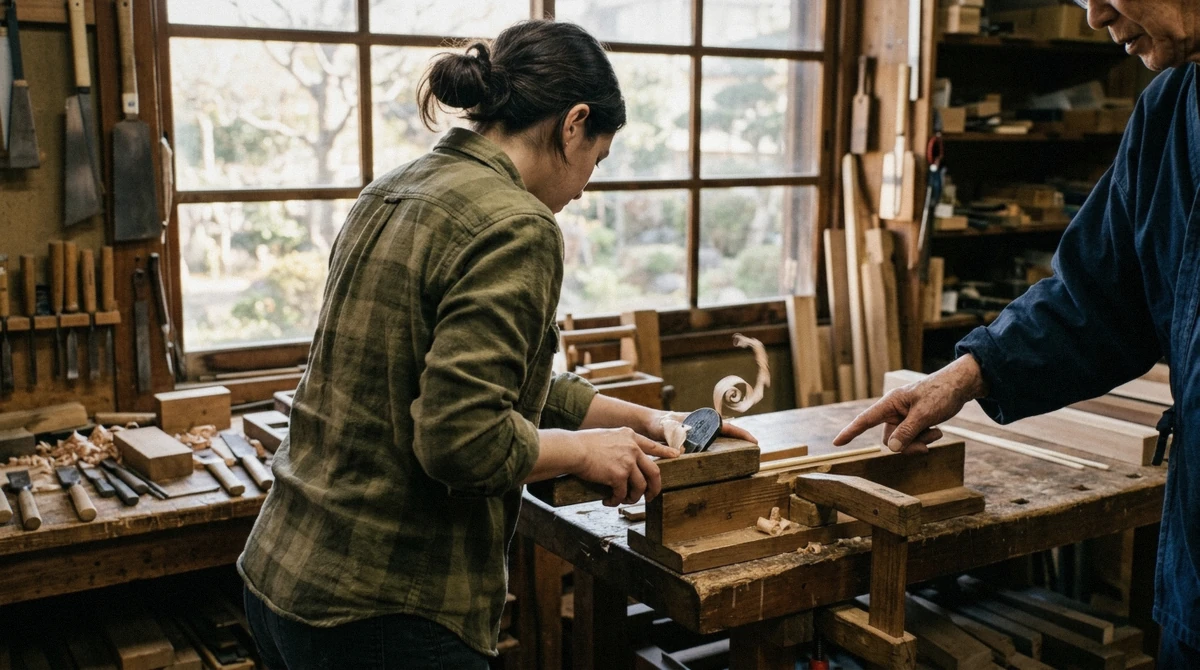
No woodworking experience is needed for your first time chopstick making in Tokyo. The kanna hand plane sits in a wooden jig that controls the cut, an instructor demonstrates every step first, and the whole class runs 45 to 60 minutes from raw blank to a finished pair you take home the same day.
Key takeaways
- No experience is required; the jig controls the plane's angle so you cannot easily gouge the wood
- An instructor demonstrates every step before you try it, so nothing is left to guesswork
- The whole class runs 45 to 60 minutes, and you keep your pair the same day
- The number one worry, cutting too deep, almost never happens because the jig physically limits the cut
- The single most common beginner mistake is rushing the taper instead of letting the plane do the work
- Children under 9 join with an adult alongside them, and the small-group artisan class is the calmest room for a nervous first-timer
Do You Need Any Experience?
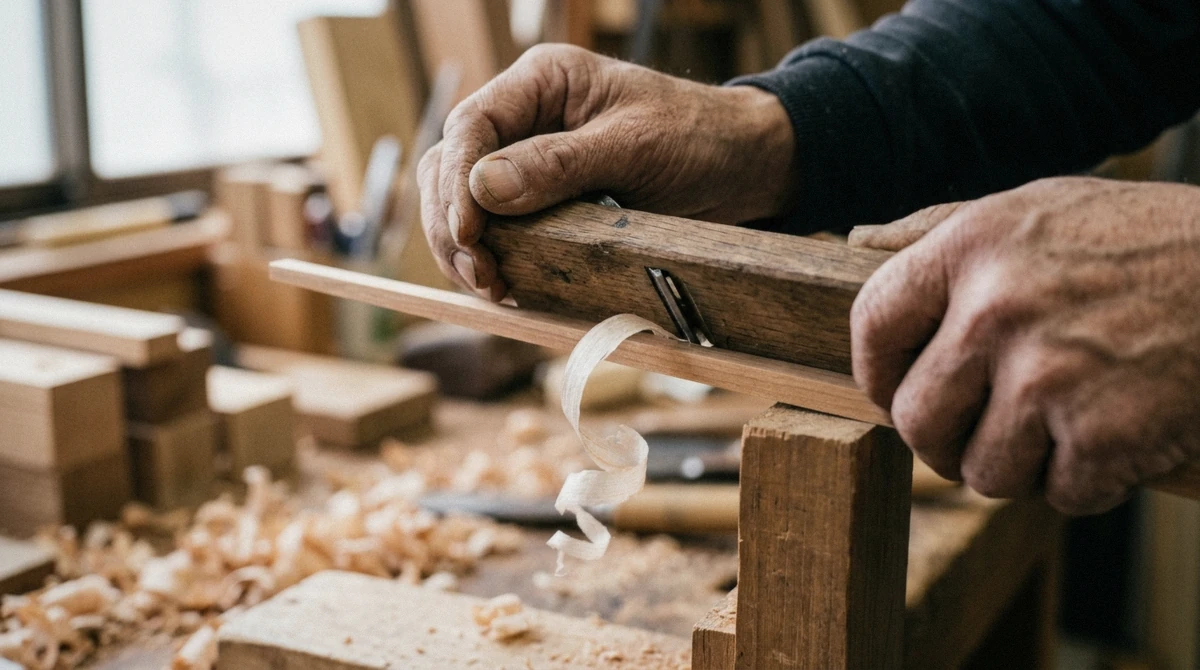
None at all, and that is not a marketing line, it is how the equipment is built. The kanna, a traditional Japanese hand plane, sits in a wooden jig that holds your blank at a fixed angle, so the plane can only move the way the jig lets it. There is no freehand cutting, no risk of the blade wandering off at an angle you did not intend. An instructor works one on one or in a small rotation, demonstrating each stage before handing the tool over, and English-speaking staff run every studio featured on this site, so nothing is lost between what the instructor means and what you actually do. There is nothing to learn beforehand either, no video to watch, no technique to research the night before; the entire skill set for the hour is taught at the bench, in order, as you need it.
Fitness demands are close to nonexistent. You sit at a low bench for the entire class, there is no standing, no lifting, and no physical strength required beyond a light, steady push on the plane. Anyone who can sit comfortably for an hour and hold a pencil steadily enough to write a sentence has what it takes to plane a pair of chopsticks; the tool and the jig do the harder work of holding an even angle. For the site's full comparison of every studio in one place, our round-up of Tokyo's chopstick-making classes covers pricing, location and group size side by side.
What Happens in Your Hour: Step by Step
The rhythm below is close to identical across every studio we cover, whether the bench sits on the tenth floor of a Shinjuku tower or in a small artisan shop near Asakusa.
| Stage | How long | What happens |
|---|---|---|
| Arrival and wood choice | First 10 minutes | Check in, then pick your wood from the included options |
| Clamping and briefing | About 5 minutes | Your blank goes into the jig, the instructor runs a demonstration pass |
| Kanna planing | 20 to 25 minutes | You plane all four sides by hand, thick at the grip, thin at the tip |
| Sanding | 5 to 10 minutes | Tips and corners smoothed by hand through a couple of grits |
| Oil finish | About 5 minutes | Oil rubbed in, the grain darkens, and your pair is done |
| Engraving, if booked | 10 to 15 extra minutes | A name burned into the shaft, about ¥1,100 |
Arrival and wood choice
You check in, get shown to a bench, and choose your wood from whatever is included at that studio, usually three species with no surcharge. This is the one part of the hour where you make a real decision before any tool touches wood.
Clamping and the briefing
The instructor clamps your rough, roughly squared blank into a wooden jig and runs through a demonstration pass with the kanna so you can watch the motion before trying it yourself. This takes a few minutes and answers most of the questions a nervous first-timer has before they even ask them.
Kanna planing, the main event
This is the bulk of the hour. You work all four sides of the blank down into a taper, thick enough at the grip to hold comfortably, thin enough at the tip to pick up a single grain of rice. The plane takes off paper-thin shavings in one smooth pull when the blade is set right, and those thin, unbroken curls are the actual sign you are doing it correctly, not a gouge or a rough scrape.
An instructor checks in periodically and corrects the angle if a side is running uneven.
Sanding the tips and corners
Once all four sides taper evenly, sandpaper softens the sharp tips and rounds the corners, working through a couple of grits by hand until nothing catches on a fingertip. It is the quickest stage of the hour and the one where the pair starts to look genuinely finished rather than freshly cut.
Oil finish and taking it home
A final coat of food-safe oil goes on last, rubbed in by hand, and it is the moment the grain actually comes alive, darkening the wood and sealing the surface. You keep the pair and take it home the same day, no shipping, no waiting for a finish to cure somewhere else.
Do You Need Japanese?
No. Every studio featured on this site runs its class with English-speaking staff, and the teaching is demonstration-led anyway, meaning you are watching a motion and copying it rather than following spoken instructions word for word. An instructor will physically adjust your grip on the plane or nudge the blank's angle if something drifts off, which works regardless of what language you think in. If your own English is not strong either, the same demonstration-first structure still carries the whole class; nobody needs shared fluent language to watch a hand plane move and copy it.
The handful of words that do come up, wood names, a count of minutes remaining, a gentle correction, are simple enough that a phrase pointed at or a number held up on fingers closes any gap that language alone might leave. I have watched instructors run a full hour with a table that shared no common language at all, and the pair that came out the far end looked no different from anyone else's.
Nervous About Ruining It? What First-Timers Worry About
This is the part worth addressing head-on rather than glossing over, since it is usually the actual reason someone hesitates to book.
| Worry | The reality | What helps |
|---|---|---|
| I'll cut too deep and ruin the blank | The jig fixes the plane's angle, so a sudden gouge is genuinely hard to make happen by accident | Trust the jig, let the plane do the work instead of forcing it |
| My taper will come out uneven | The instructor checks each side as you go and corrects the angle before it becomes a real problem | Ask for a check before moving on to the next side if you're unsure |
| I'll be too slow and hold everyone up | Each bench works at its own pace; nobody is racing anybody else through the hour | Focus on your own blank, not the person next to you |
| I'm left-handed, will the setup even work? | Planing direction can be mirrored and the jigs work in both directions at most studios | Mention it when you book so the bench can be set up right in advance |
The one thing every studio has in common: the instructor is standing right there for the parts that actually matter, the first cut on each side and the final check before sanding. You are never handed a blade and left alone to figure it out. If a worry surfaces mid-class that is not on this table, it is worth just asking; instructors field the same handful of nervous questions from every group and none of them read as a strange thing to bring up.
Bringing Kids: Ages and What to Expect
Children under 9 must be accompanied by an adult at the bench, close enough to help with the plane if a cut needs a steadier hand than a young child can manage alone. In practice, the groups we see at these classes run roughly age 10 to 60 sharing the same benches without anyone standing out as unusually young or old, and a parent sitting one bench over from an older child is a common, comfortable arrangement rather than the exception.
The 45 to 60 minute length is genuinely the right size for a child's attention span, long enough to feel like a real activity, short enough that nobody is fidgeting by the end. A child who has never held a hand tool before will still manage the sanding and oiling stages entirely on their own, since neither asks for real strength, and most of the guided planing happens with an adult's hand steadying the blank rather than a child working completely unsupervised. The Asakusa workshop is explicitly family-friendly and welcomes complete beginners of any age, and the Shibuya workshop runs a step-free studio that also suits a stroller if a younger sibling is along for the ride and not old enough to join at the bench themselves. Either is a safer first pick for a family than a studio built around a tighter, more precise premium-wood experience, where the pace assumes a steadier, more independent pair of hands.
Beginner Mistakes to Avoid
During-the-class mistakes, not trip-planning ones, since those live on a different guide entirely. Every one of these is easy to avoid once you know it is coming, and none of them ruin the hour, they just make it a little rougher than it needs to be.
- Rushing the taper instead of letting the plane's own angle do the work, the single fastest way to end up with an uneven side
- Picking a premium wood for your very first attempt; standard wood is more forgiving and easier to correct if a pass comes out uneven
- Booking the last evening of your trip for a class that runs an hour, leaving no room if your schedule slips earlier in the day
- Skipping the engraving decision until you're already at the bench, when it is faster and less rushed to decide and ask at booking
- Gripping the plane too tightly out of nerves, which tires your hand faster and actually makes the cut less even, not more controlled
- Ignoring the instructor's mid-cut correction because you want to finish a side yourself; a ten-second adjustment saves a re-sand later
- Sitting too far back from the bench, which shortens your reach on the plane and makes the last few centimeters of each stroke wobble
Which Workshops Are Best for First-Timers
Three studios genuinely suit a nervous beginner better than the rest, each for a slightly different reason.
- Small-group artisan class, Taito: capped at ten people and led directly by a working craftsman, this is the quietest room on the list, and the closest, most hands-on guidance if you want someone watching your progress the whole hour.
- Handmade workshop in Shibuya: a bright, step-free studio a short walk from Shibuya Crossing, welcoming and easy to get to, with groups up to 24 that still keep individual instruction at each bench.
- The Shinjuku ZEN class carries a 5.0 rating across 3,855 reviews, the most of any studio on this site, and patience with total beginners is the theme that keeps coming up across that pile of reviews, even though its groups run larger than the artisan class above.
None of the three above are the cheapest option on this site, and that is deliberate. A first-timer gains more from a slower pace and a closer eye from the instructor than from shaving a couple of dollars off the class price, and all three of these studios are built around exactly that trade-off.
Frequently Asked Questions
Is the class right-handed only, or can left-handed guests join?
Left-handed guests are welcome. Planing direction can be mirrored and most jigs work in both directions, though it's worth mentioning when you book so the bench is already set up right when you arrive.
Can two people share one workbench, or do we each get our own?
Couples often ask to sit side by side and each shape their own pair at their own clamp, which every studio we cover accommodates. You are not handing a single blank back and forth between two people.
What actually happens if I cut the wood wrong?
The instructor steps in and corrects the angle before a small mistake becomes a real one; the jig limits how far off a cut can drift in the first place. A genuinely ruined blank is rare, and studios generally keep a spare on hand just in case.
Do children get a discount, or do they pay the full adult price?
It varies by studio and is not always broken out on the listing page, so check the specific class when you book. Most studios welcome children from around age 9 on their own, younger with an adult alongside.
Do I need to bring anything with me?
No. Tools, wood and instruction are all included in the class price; you show up with nothing more than yourself. A camera or phone is worth having for the finished pair, but nothing is required.
Will I be the only total beginner in the room?
Almost certainly not. Most people booking a first chopstick-making class are doing it for the first time themselves, so you are very unlikely to be the only newcomer at the bench.
Should I bring a camera, or is my phone enough?
A phone is genuinely enough. The studio is calm, dry and well lit, so a recent phone camera captures the finished pair and the workbench setup fine without needing anything dedicated. Keep it tucked away during the actual planing and sanding stages, since both hands are busy at the bench for most of the hour.
Nothing about a first chopstick-making class in Tokyo asks for prior skill, strength or fluent Japanese. The jig, the demonstration, and an instructor standing right there for the parts that matter handle the rest. If you want to see what a finished pair is actually worth as a souvenir, our guide to handmade chopsticks as a Tokyo souvenir covers the wood upgrades and engraving option in full, and our honest is it worth it breakdown covers whether the hour earns its place on your itinerary at all.